
BUILD & EXPLORE
Magnetic Tile Barrier Game: Describe, Build and Compare
Try a magnetic tile barrier game with five squares per player. Set up matching workspaces, describe a hidden layout, compare the results and swap roles.
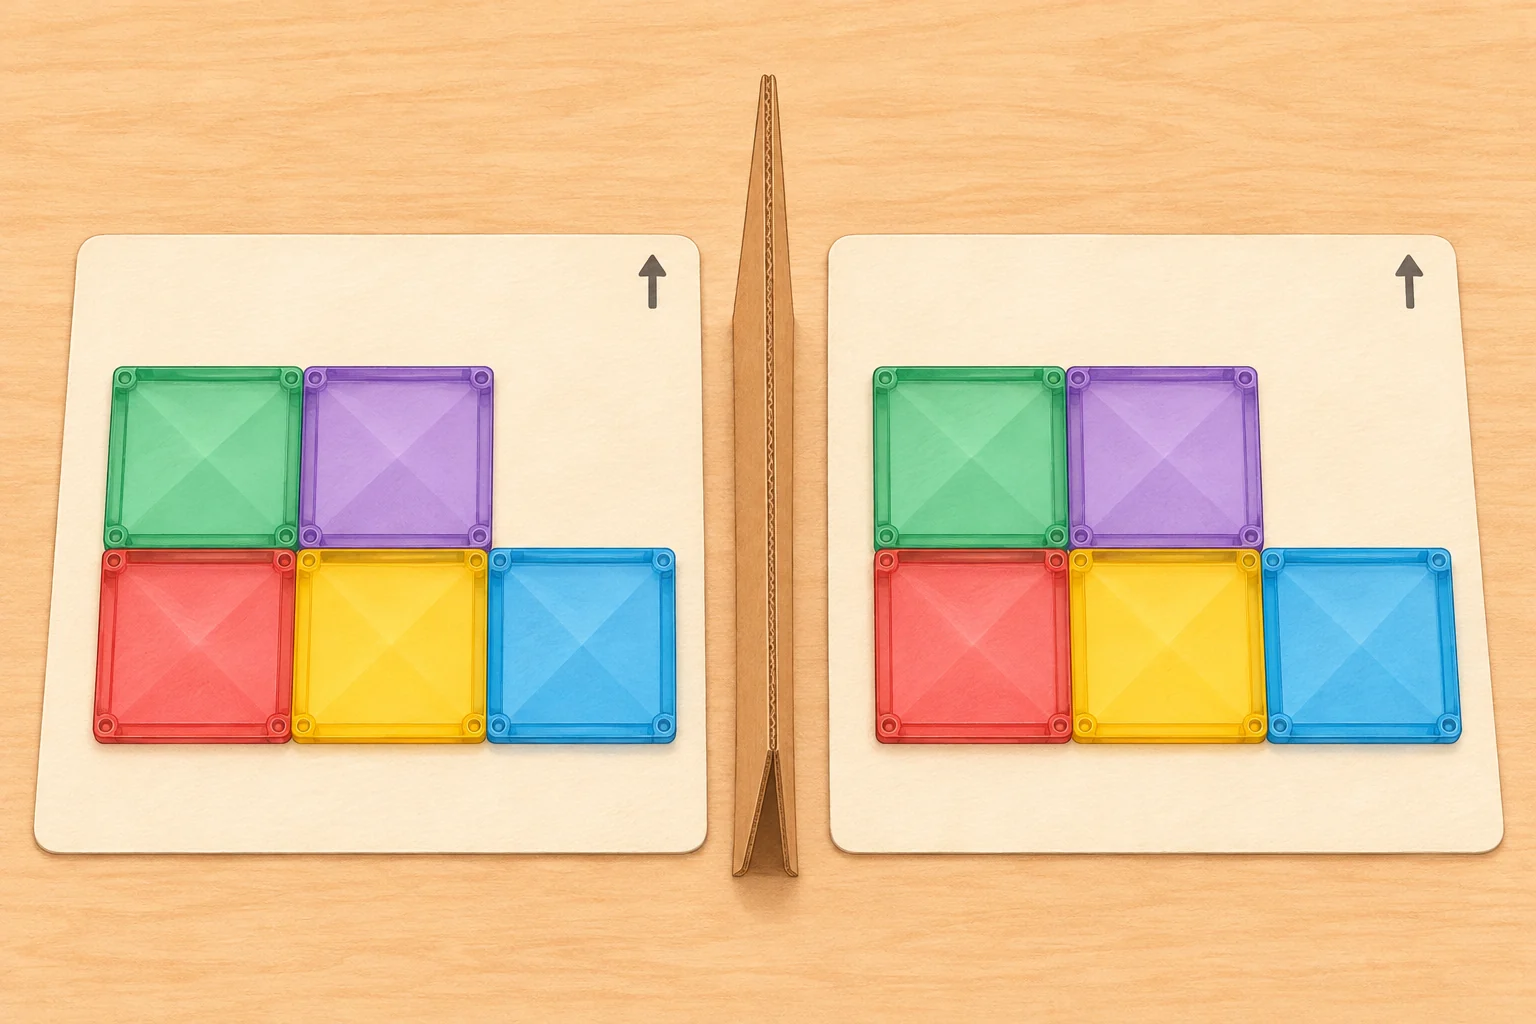
Can you describe a small tile picture clearly enough for someone else to rebuild it without looking? In this magnetic tile barrier game, two partners use separate sets of squares and a divider. One describes a hidden arrangement; the other places tiles from those directions. Remove the divider, compare the two pictures and decide which instruction to make clearer next time.
Gather ten squares for one pair
Each player needs five square tiles of the same size: ten squares for the pair. Add two sheets of paper, a pencil and a stable upright folder or book to separate the workspaces. Keep the tiles flat throughout. If you have fewer suitable squares, start with two per person or use equal-size paper squares instead.
The full five-square version is a suggested starting point for children ages 6–9 who can take turns giving and following short placement instructions. Adjust the number of pieces and the adult support to the children playing. A younger builder can try a visible two-piece demonstration with an adult. Always follow the set's labeled minimum age and supplied instructions.
Decide what counts as a match before sorting the pieces. For the first rounds, match shape and position only; colors can differ. Compare how the tiles sit relative to one another; their distance from the paper edges need not be identical. If you later choose to match colors too, give both players the same assortment. A box's total piece count does not tell you how many equal-size squares it contains.
Give both players the same left and right
Sit side by side, facing the same edge of the table. Put a paper mat in front of each player and the divider between the mats. Sitting opposite each other can turn one person's left into the other's right.
Draw an arrow at the top of each mat pointing away from the players. Keep both arrows pointing the same way during building and comparison. In these instructions, above means farther toward that arrow on the flat mat; it never means stacking one tile on another.
- Before adding the divider, point together to the top, bottom, left and right of the papers.
- Agree to line up neighboring squares along their full edges, with no overlap. Use the same small gap on both mats if the pieces do not sit comfortably together.
- Set the divider so neither player can see the other's layout. Leave enough room for a row of three squares and a second row above it.
- Choose a describer and a builder. The builder may ask questions or request a pause whenever a direction is unclear.
Warm up with two visible squares
Begin with the divider removed and two squares each. This checks the shared direction words before the hidden picture adds another task. Set the unused pieces aside.
- The describer places one square, then places a second immediately to its right, keeping both flat.
- The builder makes the same arrangement on their own mat. Say which edges meet and check that both pictures run in the same direction.
- Swap roles and try placing the second square above the first. Add the divider only when both players understand the routine.
Describe a five-square picture behind the divider
For this round, the describer privately prepares three squares across the bottom row and two directly above the left and middle squares. Leave the upper-right position empty. The builder starts with five loose squares on their own mat. Use the directions below one at a time, waiting for the builder after each placement.
- Place your first square in the lower-left part of your mat, leaving room for two more squares to its right and one row above it.
- Put a second square immediately to the right of the first. Line up the two squares along their full neighboring edges.
- Put a third square immediately to the right of the second. You now have one straight row of three.
- Place a fourth square directly above the leftmost square in that row. Keep it flat and line up its bottom edge with that square's top edge.
- Put the fifth square directly above the middle square in the bottom row. It should also sit immediately to the right of the fourth square.
- Stop with all five squares used. The space above the rightmost square in the bottom row stays empty.
Reveal and compare before moving a tile
Lift the divider without turning either mat or rearranging the pieces. Look for three squares in the bottom row, two in the row above, and the empty space at the upper right. Having five tiles in both pictures is not enough to establish a match.
Check the direction of each paper's arrow. Two pictures that match only after one paper is turned or flipped do not match the shared orientation for this round. The aim is to make the same layout in the same direction.
If the pictures differ, find the first placement where the builder's interpretation changed. Repeat that instruction more specifically, then rebuild the round. Ask, Which square do you mean? or Should that edge touch? Keep questions part of the game. After comparing, swap roles.
Make unclear instructions easier to follow
If beside that one produces a different picture, name a reference tile: the leftmost square in the bottom row, for example. Give a direction and say whether the edges should touch. Avoid relying on a pointing gesture the other player cannot see.
If a tile ends up stacked, return to the flat-paper meaning of above. Try toward the arrow instead. If left and right keep switching, check the players' seats and mat arrows before adding more pieces.
If color becomes a distraction, return to matching positions only. Different colors are not an error in that version. For a color-matching round, sort identical color collections before the divider goes up.
If several directions are being forgotten, reduce the layout to two squares and pause after each placement. The describer can repeat a direction. If tile frames or connections make the picture awkward, use loose paper squares for the same arrangement.
Run a small classroom or homeschool station
One five-square game needs ten suitable square tiles. Four pairs playing simultaneously need forty equal-size squares, plus four dividers and eight mats. Count the available shapes before planning several stations. If supplies are limited, let pairs take turns at one station.
After each round, ask the pair to choose one direction to keep and one to rewrite. A quick sketch of each result can show what they meant without requiring a written explanation. Clear the mats before the next describer makes a new hidden picture.
Keep the first new picture small and flat. Agree on the number of squares, build within the paper edges and leave the arrows in place. This is a suggested adaptation of a familiar barrier-game format; these tile rounds have not been physically or classroom tested, and no particular learning outcome is promised.
Choose the next build idea
For a different kind of position challenge, use All build ideas to find Magnetic Tile Symmetry Activity. That guide asks for a reflected pattern across a line; this barrier game asks for an exact copy in the same orientation. The beginner guide is another option when you want simple open builds instead of a hidden picture.
Use Explore the set to view the MKGCRAFTED 120-piece collection. For group supplies, Classroom & bulk orders opens the inquiry page. Plan around the square shapes required for each pair, rather than assuming every piece in a mixed set is a square.
The illustration is AI-generated and shows the example layout on two separate mats. It is a concept image, not actual product photography, evidence of a tested activity or a promise of particular box contents.
One small idea can lead to the next.
Find another build idea