
BUILD & EXPLORE
Magnetic Tile Car Garage: Build an Open-Top Parking Bay
Build a magnetic tile car garage with 5, 7, 8 or 9 squares. Compare wider and deeper bays, check your toy car's fit, and troubleshoot loose walls.
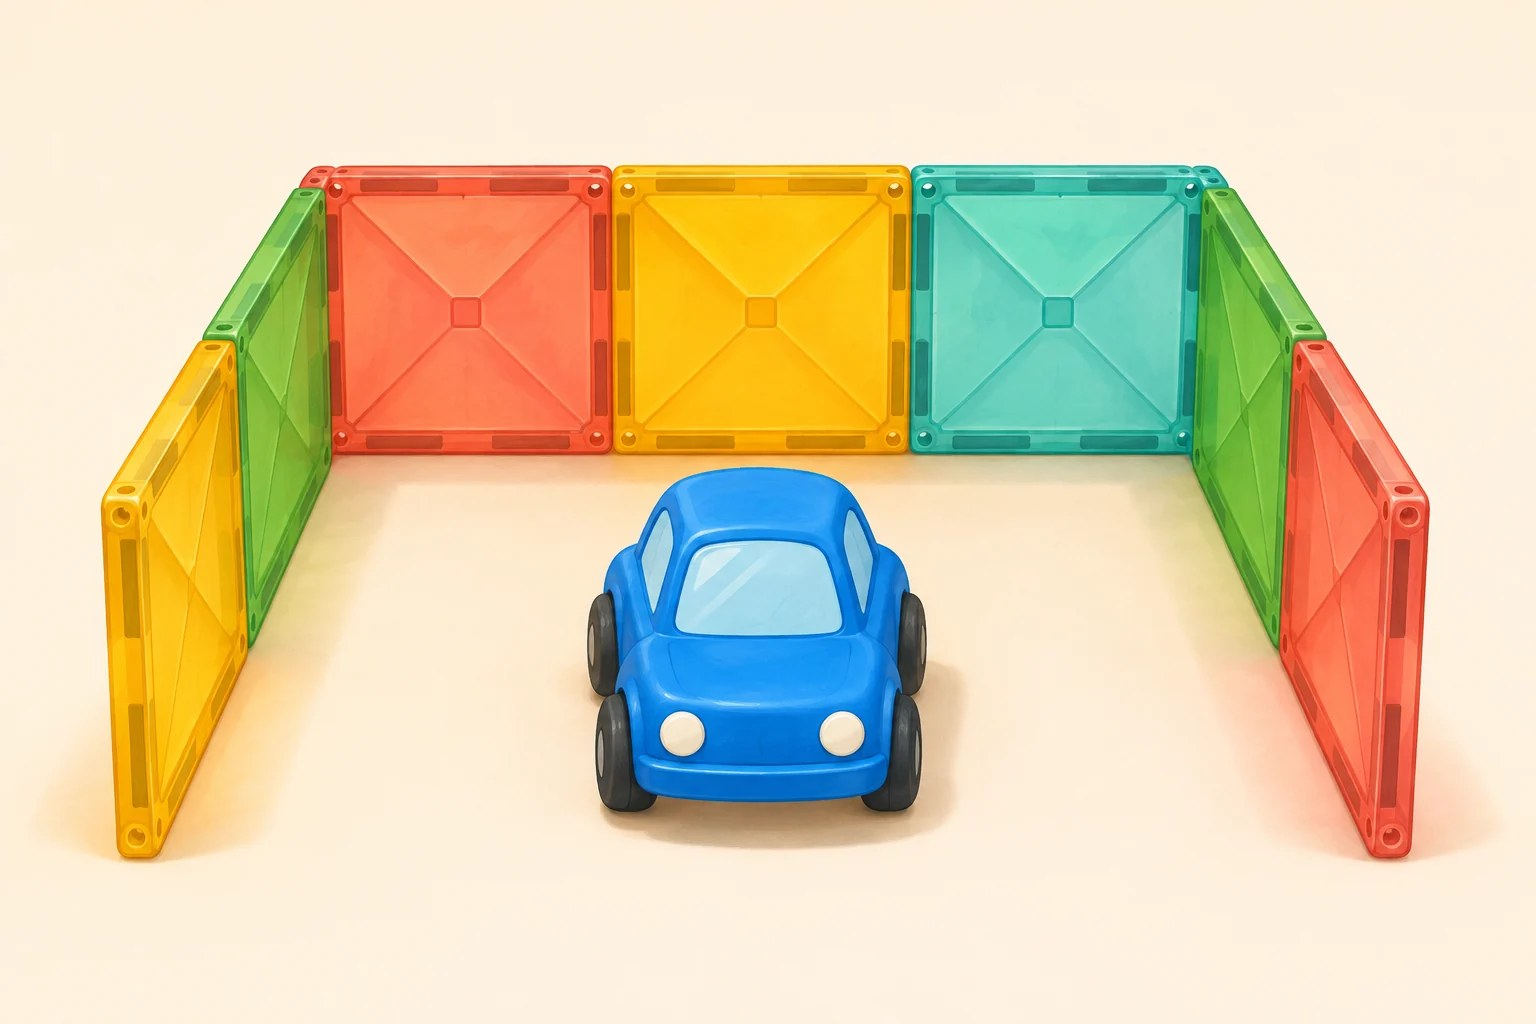
Choose a toy car, give it a parking space, and build the garage around it. This open-top magnetic tile activity focuses on three things: an entrance the car can pass through, enough room to park, and space to reach in and move it. Start with a low U-shaped bay on a clear, level surface. The floor or tabletop stays uncovered so the vehicle can roll directly into the opening.
Choose the car and gather square tiles
Use a small toy car you already have, or a rolling car base from your magnetic tile set. The MKGCRAFTED 120-piece set includes two rolling car bases. The blue car in the illustration is a generic toy prop; it does not show an included accessory.
Gather square tiles of the same size. The illustration uses seven squares: three across the back and two along each side, with every wall one tile high. Count the squares in your collection, then choose one of the layouts below and adjust it to your actual vehicle.
The MKGCRAFTED set is intended for ages 3 and up. Follow the instructions and warnings supplied with your set, and use a vehicle appropriate for the child. An adult can help hold the first corner. This is an activity concept, not a physically tested build or a promise that every tile set will hold the pictured layout.
Choose a five-, seven-, eight- or nine-square bay
Count the back-wall panels and the two side walls separately. Every wall stays one panel high; none of these counts includes a floor, roof or front wall. The totals describe panel arrangements, not exact interior measurements or a guarantee that a particular set will hold the layout.
Choose one version, then use your actual car to check the space. A wider bay and a deeper bay solve different fit problems; adding pieces anywhere will not necessarily help.
- Five squares: use three across the back and one on each side. This is a shorter version of the illustrated bay; check whether your vehicle parks far enough inside for the play you want.
- Seven squares: use three across the back and two on each side, matching the illustrated panel layout.
- Eight squares: use four across the back and two on each side. Compared with the seven-square version, the back wall is one panel wider while the sides keep the same length.
- Nine squares: use three across the back and three on each side. Compared with the seven-square version, each side extends one panel farther toward the entrance; the back wall keeps the same width.
Plan the parking space before raising the walls
Put the vehicle where you want it to park, with its front facing the future entrance. Look at its widest part, including the wheels. Leave room beside that part so the car can move without rubbing the walls.
Keep the front of the bay entirely open. Leave clear space outside the entrance for lining up the car. The surface inside and outside the bay should stay at the same level; this activity does not need a tile floor, ramp or raised parking deck.
- Place a loose square flat behind the parked car to mark the back-wall area. Place another flat on each side to help judge the space you want.
- Check that the car's wheels and body have clearance. Move the markers outward if the space looks cramped.
- Move the car aside before building. Use the marked area as a guide, then remove the flat markers as you raise the walls.
Connect the corners and leave the roof open
Build a U shape with a back wall and two side walls. Begin at a corner so you can hold two neighboring panels while connecting them. Keep your other pieces within reach and add one at a time.
For the seven-square example, the back wall is three panels across and each side is two panels long. There are no panels across the front or over the top. If you need more width, extend the back wall and move the side walls farther apart. If you need more depth, extend the two side walls.
- Hold one square upright at the back of the planned space. Bring a second upright square to its side edge at a right angle to start a back corner.
- Keep a hand near the corner while adding squares across the back. Connect the opposite side-wall square at a right angle to make the other corner.
- Extend the side walls toward the entrance only as far as needed. In the example, add one more square to each side.
- Gently release your support and check the connections. If a section falls or pulls apart, shorten it and reconnect the corner, or switch to the flat outline described below.
Check the entrance with your actual vehicle
Line the car up outside the opening and move it slowly into the bay. Watch the wheels and body as they pass the ends of the side walls. Stop if either side touches; move the car away before changing the layout.
Check depth as well as width. Can the car sit where you want without pressing against the back wall? Is there room to reach it from above? If its front sticks out farther than you want, lengthen the sides or choose a shorter vehicle. Keep enough clear space in front to roll it back out.
A car that fits when lifted into the bay may still catch the entrance when rolled in. Try the whole route, from outside to parked and back out again, before adding more scenery. This check is part of your own play session; the illustration does not establish the fit of your particular car.
Match the fix to the parking problem
Take the car out before changing a wall. Change one part of the layout, reconnect the corners, and repeat the route from outside to parked and back out. Keep the roof and front open so you can see and reach the vehicle.
- Wheels or body touch a side: rebuild the back wall one panel wider, and reconnect the side walls at its new ends. Extending only the side walls does not widen the entrance. Check the widest part of the car through the whole opening.
- More of the car sticks out than you want: try adding one square to each side wall, then repeat the parking check. Keep the back-wall width unchanged if the side clearance already works.
- The car fits inside but catches while entering: line it up straight in the clear space in front, then roll it slowly through the entrance. If a wheel or body still touches a wall, widen the bay before trying again.
- Panels separate even without the car touching them: reconnect the corner with a hand supporting it, shorten the wall, or use the flat outline below. A larger garage is not necessarily the solution to a connection problem.
Use a flat parking outline when walls get in the way
If the walls keep separating, clear the vehicle from the area and lay the tiles flat in a U-shaped border. Leave the center uncovered and the front open. The car still travels on the play surface between the tiles.
Keep the same challenge: size the opening, park inside, and get back out without moving the border. This also works when a child would rather move the car than spend time holding panels upright. You can return to standing walls during another session.
Try three parking challenges
Once the layout suits the vehicle, change the task while keeping the garage small. Move slowly and leave room for a hand to guide the car. There is no need to add a roof or another level.
- Reverse parking: turn the car around outside the entrance, then guide it backward into the bay. Check whether it needs more room to line up.
- Delivery stop: place a small paper card beside the bay as a pretend delivery address. Drive to the card, pause, then park. Keep the card out of the wheels' route.
- Two-vehicle comparison: try a second vehicle in the same bay. Compare which one has more clearance. If it does not fit, rebuild the bay before moving it inside.
Plan square tiles for a small group
Four separate seven-panel bays built at the same time need twenty-eight equal-size square tiles: four groups of three back panels and two panels on each side. Count those shapes in your actual collection; a 120-piece total does not mean every piece is a square.
With fewer squares, pairs can share one seven-panel station. One child chooses and guides the vehicle while the other watches where it touches, then they swap roles. Stop the car before either child adjusts a wall. Use the Classroom & bulk orders link on this page when planning supplies for a group.
Turn the parking bay into a town
Place a separate flat house picture or small building beside the garage, leaving the driving route clear. A short line of tiles can mark the edge of a pretend street while the car rolls on the surface beside it.
For houses and a pretend town, choose All build ideas and open 5 Easy Magnetic Tile Builds for Beginners. To explore the set, use the product link on this page. For classroom or group supplies, use the Classroom & bulk orders link.
One small idea can lead to the next.
Find another build idea